Industrial Camera Photography
A guide how to setup your industrial camera for photography.
Preface
This guide explains the function and effect of some camera parameters. It tries to show, how to get a nice image for the human eye. Automatic image processing, e.g., measurement, usually does not need a nice image. It needs the raw data from the sensor, which is provided by an industrial camera
Thumb Rules
Light
The light is the most important part of photography. Bad light, wrong angled light and flickering light will always lead to bad results.
Best results will be achieved by using a controlled light situation. In case scratches or contours shall be detected, the light should come from the side, so shadows are thrown.
Automatics
Automatics for exposure, gain and white balance are easy to use, but limited. If the scene is well lighted, the automatics can be disabled and manual adjusting of the camera properties will give the best results
Gain
Avoid gain because it creates noise. Enhance the exposure time instead.
Exposure
If the scene does not move, exposure time can be as long as needed. If the scene moves, the exposure time must be reduced, until the motion blur is acceptable.
Image Brightness
White, overexposed areas in an image do not contain any information. But dark, seemingly underexposed areas contain usable information. Therefore, avoid overexposed areas in the image.
Computer Monitor
A “True Color” PC monitor can display RGB 24 with 16,777,216 colors. The monitor settings, e.g., color temperature and brightness influence the presentation of the camera image. If the industrial camera uses a 10- or 12-bit pixel format, then this format must be transformed into the 8 bit the monitor can display. Of course, this leads to loss of information in the image.
If the monitor is old or outworn, then details of the image will be lost.
Properties
The industrial camera has properties. Some are analogue on the sensor, e.g., gain, others are image processing on the image data after digitizing, e.g., Gamma and Tone Mapping
Exposure
The exposure time determines how long the sensor captures light, before it is read out and changed into voltage.
Gain
Gain is a linear analogue amplifier on the sensor. The more gain, the more noise.
White balance
The white balance adjusts the red, green and blue components of an image, so the image has realistic colors.
Grayworld
The Grayworld automatic algorithm tries to put the maximums of red, green and blue in the histogram on the same brightness value. This works fine in most cases. On homogeneous images, e.g., a blue carpet, this results in a gray image.
Temperature
The temperature automatic algorithm tries to take care of the light source. So the above mentioned carpet stays blue.
Saturation
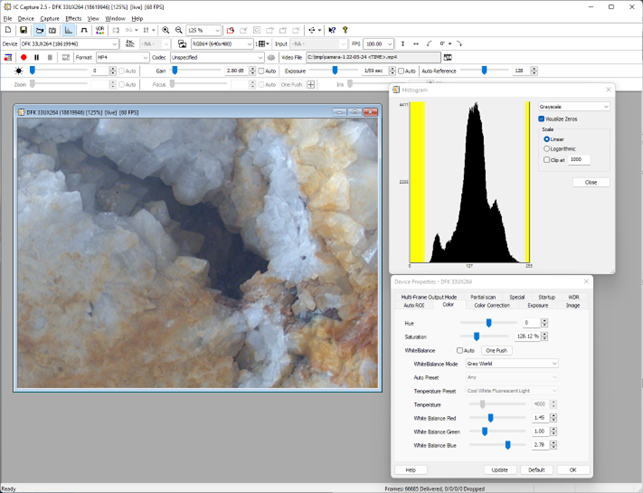
Saturation corrects the colors from unsaturated, which is a gray scale image to oversaturated, which is a colorful image. The default value is 100%. A value of ~130% makes some nice colors.
Gamma
https://en.wikipedia.org/wiki/Gamma_correction
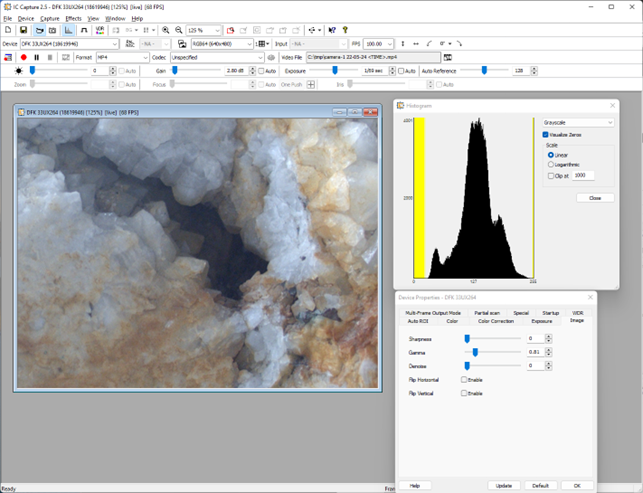
Gamma adapts the brightness values. A value lower than 1.0 makes the image brighter, a value greater than 1.0 darker.
Tone Mapping
Tone Mapping is, like Gamma, a histogram function. It is a powerful property for making high dynamic images well visible on a monitor. It has its best effects, if the source video format has 10- or 12-bits per color channel. The image on the monitor must be downscaled to 8 bits per color channel.
Intensity
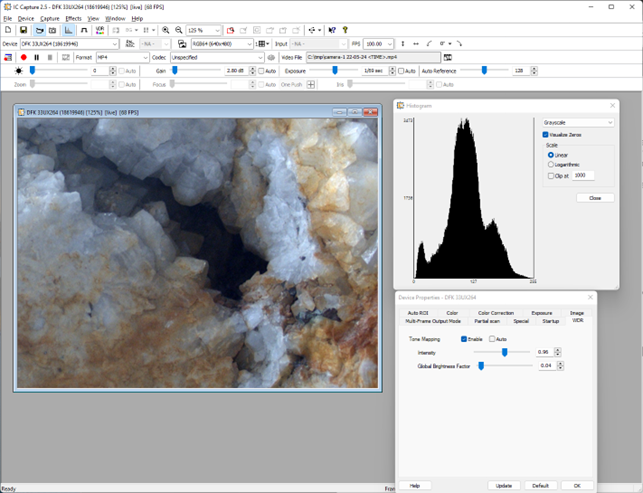
Intensity changes the intensity of the LUT transformation.
Global Brightness Factor
The Global Brightness Factor changes how much of the global brightness of the image should be used to offset the pow-factor-table vs how much of the pixel local luminance should be used.
Make Dark Areas Visible
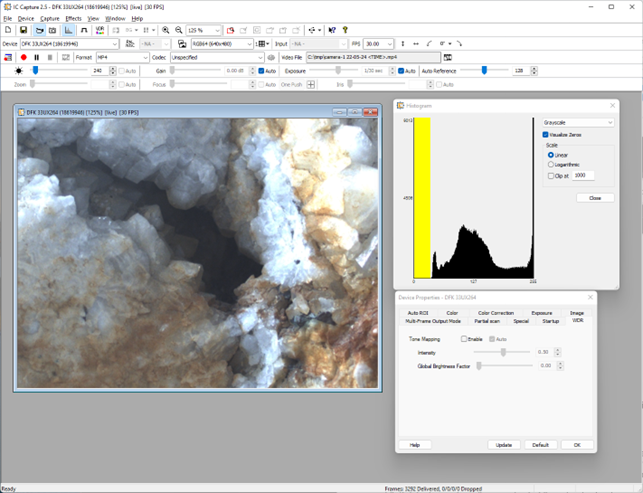 There is a high dynamic scene with very dark and very bright areas:
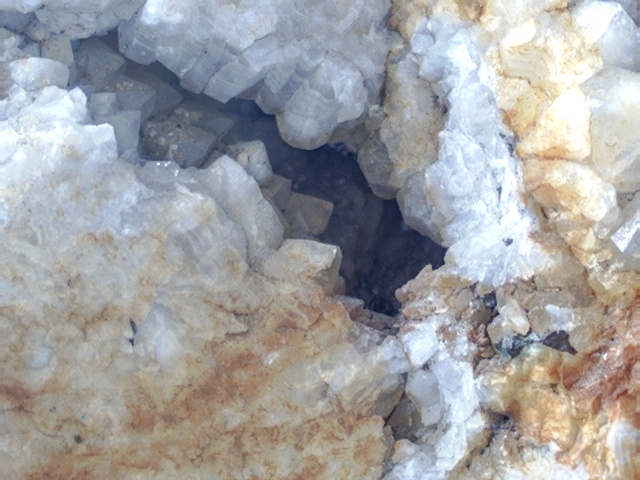
The crystals in the upper right corner are overexposed, while the dark area in the hole in the middle does not show any details.
Video Format
The RGB64 video format should be used. It provides 10- or 12-bit color depth per color channel. The 37U camera series provides 10 bit, the other camera series 12 bits. The additional bits are in the lower, dark brightness range of color depth.
Histogram
The histogram is an useful tool, it shows the brightness dispersion on the image. Here it shows that there are no dark pixels, which is indicated by the yellow area in the histogram. It also shows that there are many overexposed pixels on the right side of the histogram. The goal is to reduce the number of overexposed pixels.
The missing black pixels can not be restored, that is sensor dependent.
1.3 Adjust Exposure Time
Gain and white balance are disabled now. Brightness is set to 0 in order to lower the Black Level and move the histogram to the left.
The exposure time is set to a value that shows no overexposed values on the right side of the histogram
Currently the exposure time is 1/69 second and there are only a few pixels with a brightness near 255.
Tone Mapping
Now Tone Mapping is used to brighten the dark areas, while keeping the brightness of the brighter ones.
The "Intensity" property is adjusted first.
The Intensity value should not be too high in order to avoid the bright pixels being lost. Now the crystals in the dark hole become visible.
Then the Global Brightness Factor is adjusted in order to spread the histogram a little bit.
Gamma
Gamma is used to brighten the image a little bit. It should be used careful because it removes many details:
Sharpness
The edges between details are made more prominent with Sharpness:
More details become visible in the dark hole.
Saturation
With higher Saturation some colorful details can be enhanced:
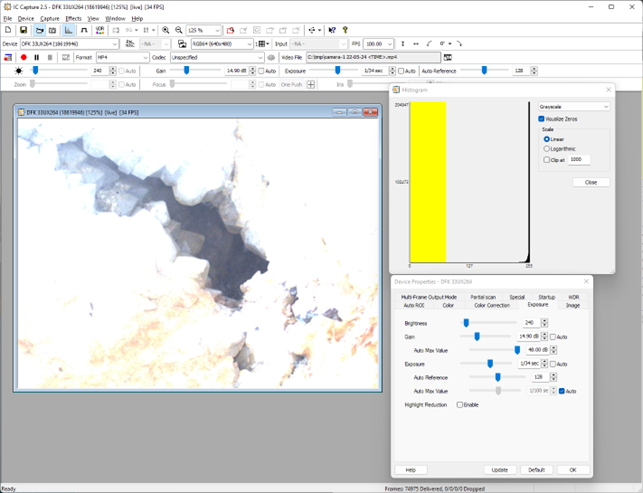
The Hole with Exposure Time only:
In order to show the details in the dark hole only, the exposure time can be used as only property to be set:
This is just for demonstration which result is achieved without any image processing.
Summary
Of course, pointing with a light source on this scene, so the hole comes out of shadow, will make better results.
All automatics are turned off. If the light situation changes, then the image will become over- or underexposed and the adjustments must be done again. An industrial camera is made for constant light situations.
To overcome such a situation a software must be used, that receives images width different exposure times and therefore different brightness values and which combines them in a smart way. That process is called HDR and can be implemented with e.g., OpenCV. https://docs.opencv.org/4.x/d2/df0/tutorial_py_hdr.html
HDR
The same scene is photographed four times with different exposure times and merged using the OpenCV algorithm mentioned in 6.9 the result is:
The exposure times of the processed single images are
exposure_times = np.array([0.1111, 0.0588, 0.029, 0.014], dtype=np.float32)
This image shows for best results more than one source image is needed. Calculating the exposure times in a smart way from the exposure time the exposure automatic returns, makes this light independent. The process takes some time, therefore it is suitable for still standing scenes and single photos only.
If you have any questions, please feel free to contact us at https://www.theimagingsource.com/en-de/company/contact/
For further questions, please use our contact form


